November 10, 2021

Moorish Rose Pot Holder


Been a while since my last update here; so many things going on; then the shut down...  I had been thinking closing down this blog, and just put all new posts on my shop's website.

But then, some of the things I make (OK, a lot of the things I make) don't exactly fit in there.  And it would be sad that these treasures of mine, many made with blood, sweat, and tears, just languish in back of the WIP pile.

So, I figure it makes sense to keep this blog updated, and hopefully will eventually catch up with my adventures and play time!

OK, here is one not exactly from back of the WIP pile, it's actually out on my kitchen counter, contributing to daily chores ;-)

My Moorish Rose Pot Holder!

This is done with stainless steel binder rings, big ones!  Good thing about binder rings?  No need for pliers ;-)  But then the ARs are so big ( I don't remember how big...) that it was a bit difficult to see the pattern at the beginning.  But once the center 7 are done, it did become easier to continue; then, it started to weigh more, quite a bit more...


And I forgot to take WIP photos, but this is how big it ended up being...


Compared to the few smaller ones...


Or, as Dorothy modeling it here...


In any case, it's now my go-to pot holder :-)


*
**
****
*****
****
**
*

October 26, 2020

Monarch Butterfly Earrings - On the Journey to Finding an App

When the proverbial creative door is closing, what do we do?  Go find a new window! Like, when the I felt I wasn't going anyway fast with jump rings, I looked into my other craft supplies, say like my bead stash because I have more beads than I can ever figure out what to do with...  So I started browsing online to see what's new out there in the beading world.

Guess what?  I struck luck!  3D beading; or properly it is called Contemporary Geometric Beadwork.  Look it up if you're interested. From what I can find, it actually has been around for at least a decade, while I was head over heels with chainmaille (don't get me wrong, I still am...)!  It's a treasure trove of artwork all done out of tiny little beads, mostly Delicas but also other seed beads and gems sprinkled over.

It didn't take long before I was up beading instead of sleeping, again, hahaha!  So nice to have something exciting in these sad days of 2020...

So, long story short, I briefly jotted down what I've done with 3D beading in my shop's blog page here:

Blue Flower 3D 5-Wing Ring and All Its Lovely Siblings

But the vain side of me took over soon, because having piles of little trinkets is one thing, wearing one would be so much more fun!  Hence, "Finding an App" for the lovelies, such as these fluttering beaded Monarch butterfly earrings! 


They're not your "imitating real life" Monarch butterfly earrings; heck they're not even exactly the same between the two pieces!  But that's how they are in real world, no two Monarchs are exactly same.  That's what makes life interesting!

Each butterfly is attached to a long piece of wire, so they don't hit your face as they sway and flutter as you move.
For more details, please visit:

August 24, 2020

Long Time No See

Hello friends,

It's been a very long time since I last posted here.  My apologies.  Life happens, more happy ones than not, very grateful!  But still, there is always more than I can keep up...  One of my to do items remains how to combine all my favorites so I may get them all sufficiently covered, such as making a chainmaille collard for my girl Dorothy.


Quite fitting, right?

I'm hoping in the near future, I can maintain a more regular schedule updating this blog with all the coming and going:-)  Hope to see you all here too!  Thank you!  (and you too, Dorothy!)

Daisy

December 22, 2017

Holiday Trinket 2017 - Recycled Snowman Pendant

Introducing my 2017 Holiday Trinket:  Recycled mobius snowman pendant with JPL scarf!


Does that look like a snowman?  Oh boy, I hope it does :-)

Here's a closer look.


There's the small mobius as snowman's head, big mobius as the body, a tiny pink and purple mobius sits flat on top of the head as the rim of its hat, with a white rubber ring on the very top to hold all in place.

Then there's the JPL scarf wrapped around the neck, with couple of purple Swarovski bicone beads decorating the ends.  Dangling in the center is another couple crystals as the snowman's buttons.  Ah, perhaps this next picture shows better, right?


So you may be thinking, why "recycled"?  It's because the whole pendant is made of recycled components.

The snowman's head and body were a segment of Dorothy's necklace that broke off after she and Pepper were battling for world dominance in my backyard few weeks ago; nobody won; but the only obvious loser was the necklace...

When I found the broken piece of the big and small mobius units, I thought, "Wow, don't these two look like a snowman?!"  So I went to my stash of experiments, and found the short length of JPL, also in bright aluminum, the perfect scarf for the snowman; then a tiny pink and purple mobius that was part of failed flower earrings; together with an orphan rubber ring in what make for the snowman's hat on a simple wrap loop head pin.

The only thing left was to add some bling; which is never in short supply on my "scrap stash".  So two go on the scarf ends; two more hang in center as the buttons.

Now I just need a necklace to hang it.  Interestingly, I couldn't find any appropriate neck chain in the recycle pile.  So there goes the brand new metal mesh ribbon in lime green!  I've always wanted to use the metal mesh ribbon but couldn't find a right project, until now, that is...

So here it is, my 2017 holiday trinket, the newly recycled snowman pendant!

Happy Holidays, everyone!

August 21, 2017

Byzantine Sun Collection


Aren't these FUN?! :-)

They're so cute, too, holding them in my hands is like having Christmas in summer!!

I love making these pretties, but not so much photographing them...  Well, I never like photographing anything, anyway, sigh....  (why does it always seem to take longer to take pictures of them than actually making them?  hum...)

But, I did manage to get a few of them posted in my shop; have a look when you get a chance; it's under the category: Byzantine Sun Collection.

Thank you for stopping by!

*    *   *  ****************  *   *   *

August 17, 2017

Her Highness, the Frou Frouie Purple Princess

Been a very, very long time since I last updated my blog here; almost a year, according to the date stamps; where has the time gone when we're having fun?!  :-)

Not getting around to post my new pieces doesn't mean there isn't any ;-)  For example, this very purple, very royal looking dragon!


This was custom made for Kay S's best friend who adores all things purple.  (Aww, me too!)  In preparing for the color scheme, Kay and I agreed on this organic flow of different shades of purple, from violet (red/purple), true purple (blue/red), all the way to fuchsia, and a couple of pink!  It was really shear awesomeness in purple!!!


Too bad my camera simply is a bit beyond its "effective" date (aka. too old) to show all the differences in colors...  Sorry you may need to add a pinch of "imagination" here ;-)


(this little fella seems to agree? LOL)

Oh you gorgeous Frou Frou Purple Princess, you still look marvelous none the less!!


Check out the little princess's other siblings at All My Pet Dragons gallery

January 4, 2016

Chainmaille Wrapped Coins and Mirror

Happy 2016, everyone!!

Hope the new year finds you well, and all ready for a fantastic year ahead!

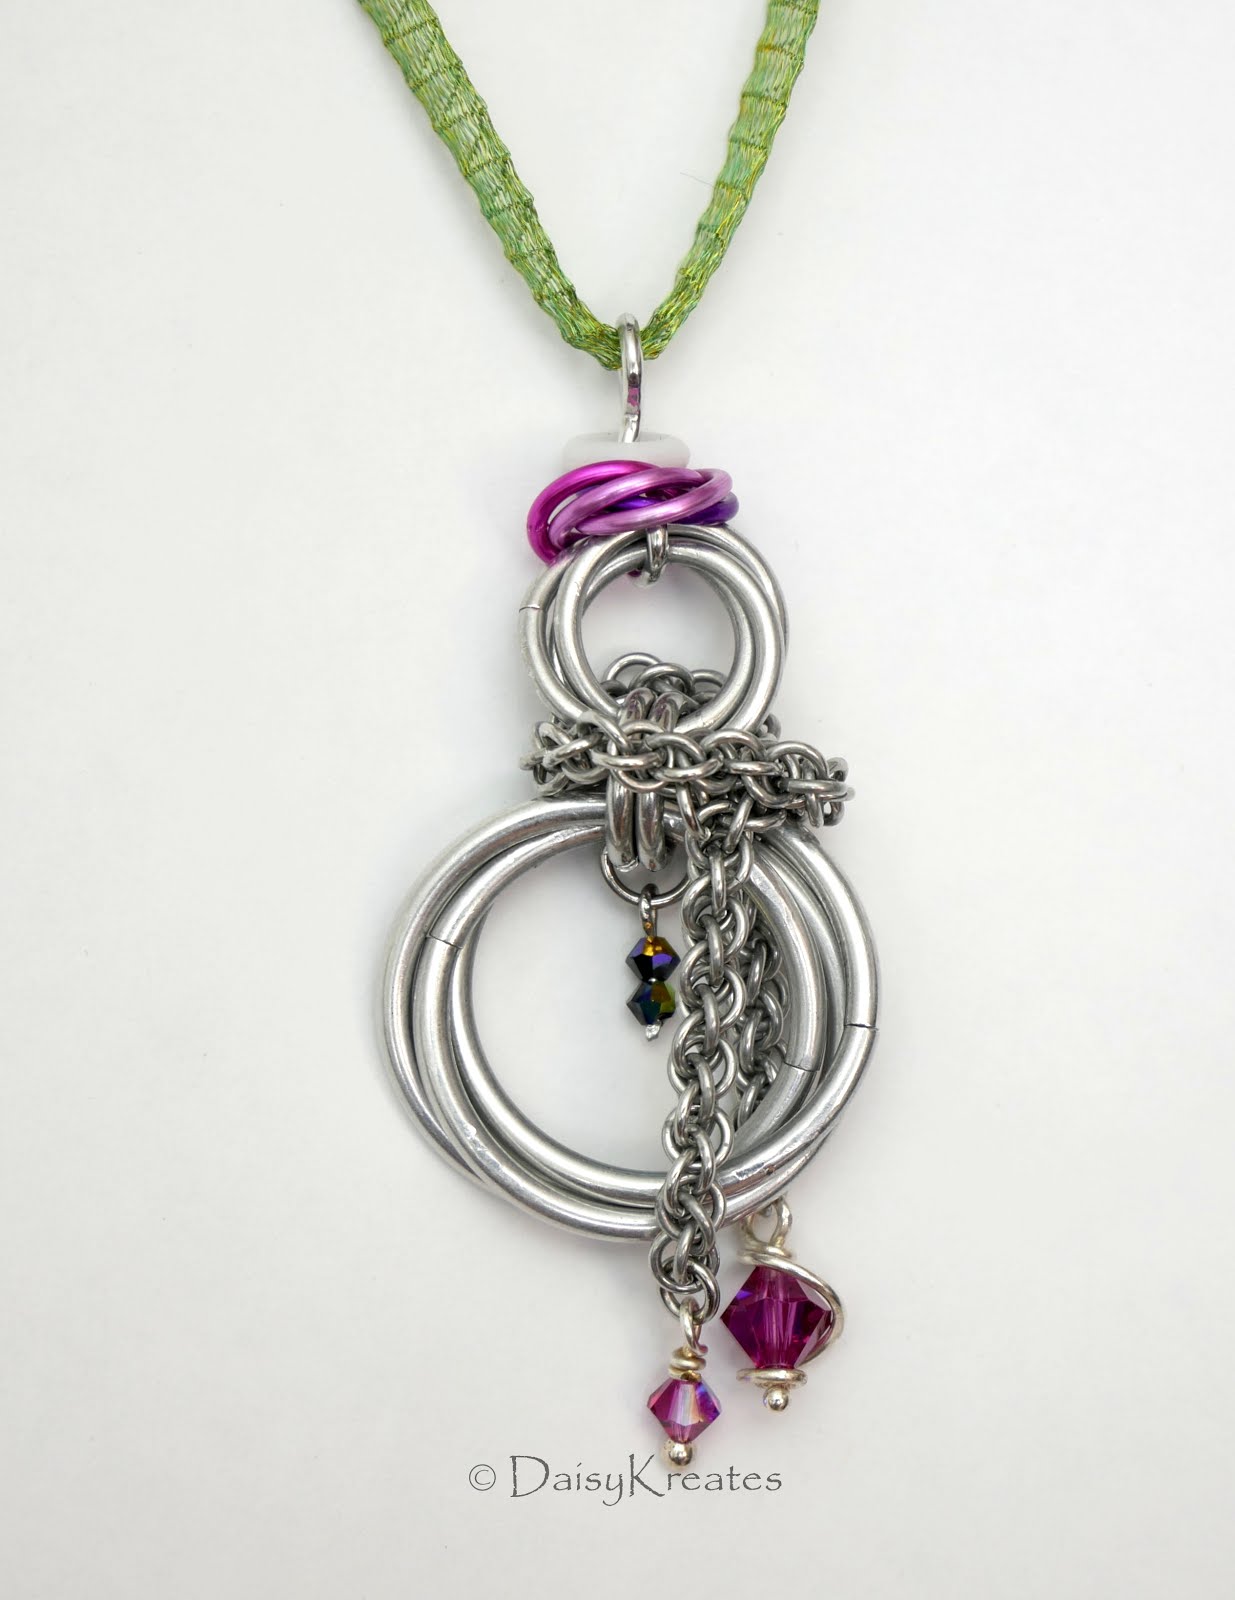
Me, as the ever diehard mailler, ringed in the new year with some new chainmaille projects (of course) of my own: Chainmaille wrapped objects.

Been seeing many talented maille artists' work in using chainmaille weaves to wrap all kinds of stuff, stones, bottles, disks, wind chimes, coins, you name it, but I'd never found the right projects for me, until now...


Yup, it's a 八卦鏡!  Jean has this on a plastic channel wrap that originally came with the mirror; but that wrap finally broke from exposure to the sun for many years.  Perfect timing for me to try my hands on replacing the wrap with metal rings!

So before I start on wrapping this 6" diameter mirror (and its separate cork backing), a little proof-of-concept is needed.


That's right, this POC is not anywhere close to what's finally on the mirror, and that's because I couldn't get this Japanese 2 in 1 based wrap to stay put around the mirror, no matter what... But I had no problem in closing the wrap on these two US nickles.


My guess of the issue is because this wrap doesn't have its own "structure", it mostly forms to the shape of whatever is being wrapped.  Plus, the "channel" depth of this wrap needs to come in more over the face of the coin, somewhat like 1/7 of the coin diameter, in order to securely hold in the object being wrapped.


1/7 of the diameter is OK on small objects like a coin of a donut pendant; but it won't look right on a mirror that's over 6" across, so...  the search was back on.

.............

Thanks to the internet, there is a huge collection of wrapped objects in pictures and in detail specs.  Almost too many to choose from :-)   In the end, I settled back on the good old Alligator Back, which is also the belly/base of all my chainmaille pet dragons :-)


The deep channel of Alligator Back can keep its shape with or without an object to hold onto.  In addition, I "cinched" the outside HP3in1 rings with the smaller rings in Euro6in1 (although in this case, it's really one ring thru 3 rings since they're on the edge.)


An extra piece of wire is also threaded thru the middle of Alligator Back, which is the center column of its Euro4in1, to give extra support to the wrap, as well as a separate and stronger point to connect the spiral chain on top.


Now it's all very secured, and very pretty :-)


Stats:
All jumprings are bright aluminum, 18 gauge SWG, 1.2 mm; power-coiled on 3/16" mandrel and saw cut on my Ringinator, except the outer edge rings on the Alligator Back are 1/4".

Yup, those metal rings are going to last a whole lot longer than the old plastic loop:-)

December 23, 2015

Holiday Trinket 2015

Apologies for being a little (more than) tardy for my yearly holiday trinket creation...  But, better late than never :-)


Ta Da!  A minimalist, tall and skinny Christmas tree made in European Vertebrae with graduated sizes of rings, in various materials and colors, complete with its own decoration of dangling rings!  Plus a tree topper with a Rosetta-edged whirlybird and a wire wrapped bead cap.

OK, let me guess what you're thinking, "That's not much of a tree"...  Hey, there's nothing wrong with ad hoc mailling, specially when my hands are still hurting from wrestling with those thick niobium wires, not to mention it's a great way to recycle, improvise, and learn something new at the same time.


So, what have I learned in making this tree?  Quite a few:


1.  The dangling rings in the middle of the "tree trunk" add colors, dimension, and movement.  They are forgiving in AR, so great way to incorporate the orphan rings!
..................::: ooOO:::..................


2.  Got any bead about the right size to fit in one of the big rings?  Put a wire thru the bead, wrap a single loop on each side, and thread thru the big "tree trunk" rings, for extra bling!
..................0O0..................


3.  Then there's the tree topper.  Well, I cheated a little on this one ;-)  If you had visited this blog from back when I first started mailling, you may have seen my Rosetta whirlybird bead from 2010, and the wire wrapped bead cap from even before my chainmaille days.  I've been saving them for the right spot to shine, and here they are!  String them together on top of a white flower bead, form a double loop on each end, and there is the adorable angel with the fluffiest ruffle collard!!

Well, what can I say, imagination has always been my best friend, LOL!

♥ Happy Holidays, everyone ♥

~~~~~~~~~~~~


June 12, 2015

Sharon H.'s Custom Designed Jewelry Set in Ghenghiz Cohen Chainmaille Weave

Not much can be compared to this puppy; nothing ever even come close :-)

When Sharon told me she found a couple of pieces in my studio catching her eyes and would like to have something made to match the B²+1 Maltese Cross earrings, I thought, "Wow, that would be pretty!"

..........

Well, it's way more than pretty, it's awe inspiring!!


It's substantial, sparkly, eye-catching, ...  100% spectacular!!

The cross focal is 3 inches long including the crystal dangles, 2 inches across, nearly half inch thick, built with mostly 14 gauge SWG round wire rings in bright aluminum and jewelry brass, with the hidden "queen ring" of the B²+1 unit in 12 gauge that called for some serious muscles out of this old lady, LOL!!

Ah, but the end result is a mesmerizing, three-dimensional texture that is extremely sensual to the touch, if you don't mind me saying so.  I seriously pat myself on the back for this most fabulous chainmaille motif I've ever created!!


  Yup, you probably have to be a chainmaille diehard like me to fully appreciate this level of euphoria!  But I won't lie, those big and shiny Swarovski gold and silver crystals are the magical touch that really made the whole thing pop!  By the way, I'll share a little tip just in case anyone ever runs into this:  Apparently Swarovski doesn't make Aurum 2X bicones in 8mm, only up to 6mm, now you know :-)


To match the brilliance of this gorgeous necklace, Sharon picked out the same Ghenghiz Cohen weave for the matching bracelet, but with an upgraded size of my Moon Rise toggle clasp for closure.


I must admit, for as many Moon Rise toggles I've made, each one is still an adventure to create, specially when it's made with thicker and harder metal than pure copper.  What we see here is actually the 4th one that finally fit the bill just right, hence the saying, "No two are exactly alike!" :-)

For more views of the necklace and bracelet, they are currently available in my online studio DaisyKreates.com.

V
V
(())(())(())>>o<<(())(())(())
^
^

June 6, 2015

Tool Storage

So I've been hoarding, uh.... I mean, keeping many tools for my crafting activities.  It started out with a cutter and some pliers, all fit in a small pencil box.  Then before I knew it, they grew into a collection of their own!!

I had struggled to find a way to store and organize them, in a way that they are easily accessible, can be quickly identified, either by sight or by touch, and I want them to be mobile, because I like moving things around :-)

Years ago, I had this "not so little" DIY tool box made out of 3 shipping cardboard boxes.  The small and medium ones hold the pliers, note book, and what not.  They all sit in the middle of the lid of the large box.


When I'm done using them, I put the large box on, and the whole thing goes onto the shelf.


Pretty neat, right?!

Then time goes on, and I managed to further my hoarding career...  Yes, it might as well be a career since I can't seem to stop it!  Now I use all sorts of pliers, cutters, hammers, hand saws, anvils, plus wires, chains, tubing, etc.  Time to reorganize!

The goal is to keep the tools handy, mobile, and out of the way when done.

And here's what I got!  My rolling tool cart.  What do you think?

I love this wire cart!  So much so, I got two of them:-)  Here's how I use one of them.
  • The most used tools, that'd be the pliers and cutters, go on the side-hanging, recycled priority mail boxes.  They're just held to the cart with some masking tape for now, since I'm not one for commitments :-)
  • On the corners are the sharp and pointy cutters in scissors pouches so I don't accidentally stab myself.
  • In the hanging folders are wires from 8 gauge down to 30.
  • At the bottom are more pliers, mandrels, hand saw, with all the heavy duty hammers and anvils.


The best part?  When I'm all done, it rolls underneath my work table :-)  It's out of sight, and most importantly, out of way!!


Pretty cool, yeah? :-)  I love the fact that it's on wheels, so the whole thing can be moved around easily.  I got these wire carts from Costso, they are fabulous!  Lots of configuration, sturdy solid wheels, holds up well and rolls smoothly!

Now only if I can get my whole studio organized as well....

....  ;-)  ....

April 25, 2015

Pet Dragon with Fire Mix Scales


Meet Sharon H's new body guard!


Mr. Lil Smaug, the chainmaille version, that is :-)


Thanks to the beautiful scales from Blue Buddha Boutique and C&T Designs, this handsome dragon gets to wear the most shiny armor ever!


Isn't he the cutest?!  :-)

So far, I've made a number of dragons.  What's the same is that every one of them is a labor of love; what's different is their personalities; each is unique.  How amazing is that?!!

Want your own pet dragon in your favorite color mix?  Please visit my online studio DaisyKreates.com for more details.

March 14, 2015

Playing with Metal - Sprite Earrings

Much safer than playing with fire!! :-)


For as much as I'm addicted to chainmaille, from time to time, I would find myself back doodling with metal wires, for its flexibility, fluidity, and best of all, forgiveness :-)  With only hand tools, forming the coils, stretching it, loosening a round, compress the next few, the possibilities are endless!

And if it's with niobium...


You can add pops of colors too; they are pure joy!


Now available in my online studio www.daisykreates.com.


btw, did I mention the possibilities are endless? :-)
They're equally delightfully in all precious silver!


       ~ ~ ~ ~ ~
~ ~ ~ ~ ~  

February 5, 2015

Forged Heart Pendant

Following my original design of S-hook clasp, I went on to experiment with more complex versions.  One of the variations was the whimsical ducky clasp, which is a stylized ducky outline complete with a pointy tail, folded wing, and a long beak that easily catches and releases to function as a clasp.

Alternatively, when I bring the beak closer to touch the duck body, then turn the duck side way, it becomes a shapely heart!  Additional bending and forging of the wire creates the varying thickness in the final heart shape, reminiscent of calligraphy but with metal.


Since I can never stay with just one color, this newly re-purposed clasp got a rainbow dip in the anodizing pool, so to speak (hahaha, I crack myself up!)


OK, so it's pretty easy so far.  Finishing the heart clasp on a necklace is a different story.  Deciding where to add the crystals, how to hang the pendant, what kind of neck ware, and how does it clasp, etc etc...  The devil is always in the detail.


But I must say I'm pretty happy with the results.  Every little part fits together finally and nicely, making it a one of a kind necklace that's dainty in scale but bold in presence.  Icing on the cake?  This beauty went straight to a dear friend the second it's listed ;-)

To order your very own Forged Heart necklace, please visit the listing my online studio www.DaisyKreates.com.